|
If one affinity is good, more should be better...
|
In iterating a single transform, even one that included
shrink, spin and displacement components, the trajectory of
points on the screen was predetermined. A single transform always
moves a certain point in a certain way so that most of the screen
is inaccessible from any given point. Now we want to consider the
situation where there are two or more transforms available, and
we can choose which one we will apply at any time. The transforms
we will use for now are:
1. xsize=1 , ysize=1 , xspin=PI/4, yspin=PI/4,xdisp=0, ydisp=0
2. xsize=.9, ysize=.9, xspin=0, yspin=0, xdisp=1,ydisp=0
Run the
selectable transform
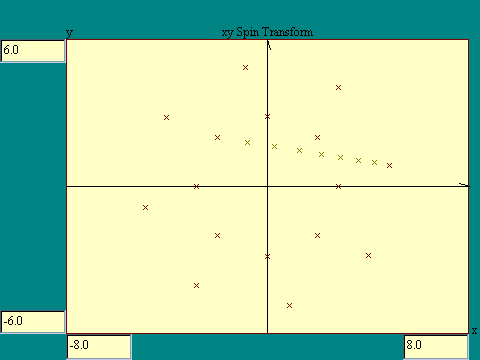
display. Notice that in the image at the right from that display, there are two
octagonal arrays of marks connected by a straight line. This shows that a spin
transform was iterated 8 times followed by 8 iterations of the shrunken
displacement transform and then 8 iterations of the spin transform again.
|
|
|
Remember that with each change of transform, the starting point for the
iteration of the new transform is the last point landed on by the old transform.
Run the
8-1-8 transform pair
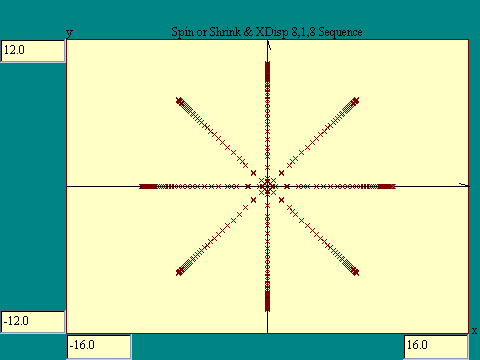
display. In this display we run 8 iterations of the xy spin transform followed
by a single iteration of the xy shrink and displacement transform. As this
process repeats we create a collection of octagonal arrays of points of different
diameters.
|
|
As you can imagine, there are a great many possible sequences in
which these two transforms might be called. Consider what sort of pattern might
be developed by invoking these transforms in a different order. If we run the
xy spin transform 9 times to every 1 of the xy shrink and displacement transform,
each radial move will start from the spin location one iteration father along
than the previous.
To illustrate that situation, run the
9-1-9 selectable transform
display. You will notice that the ultimate patterns that
developed on the screen are quite different from the 8-1-8 case even though the
transforms are identical.
|

|
|
The point of the last two displays was to illustrate that by
mixing the application of two affine transforms, complicated
patterns of points might be produced and the nature of those
patterns depends on the order in which the transforms are
applied. The sequence in which we applied the two transforms had
in each case a definite order to it. If we had sufficient time
and patience to try all possible combinations of our two
transforms, we would discover that there would still be some
areas of the screen that were not accessible. Like the
directions to East Millinocket, you can't get there from
here.
The set of all points that can be reached using a given set
of transforms comprise an interesting figure that is finite in
extent but has an infinite boundary. This of course is the
fractal that we promised to generate in this section. As a
practical matter, it takes too long to lay out and carry out a
scheme to cover all possible sequences of calling even two
transforms. With more than two it is worse. The best we can do is
to approximate the full range of possibilities by selecting the
transforms in a nearly random fashion and let the process run for
a long time.
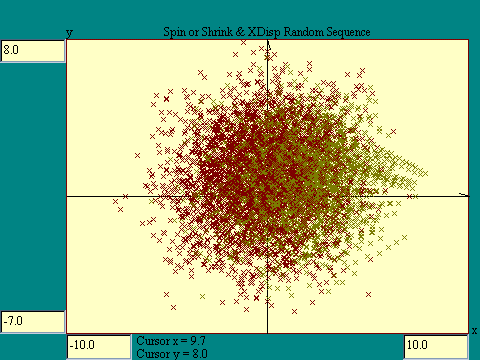
To illustrate this technique, run the
Spin or Shrink + X Displacement - Random
display. What you will see is not particularly impressive, sort of a
non-descript blob, indicating that the choice of the example transforms was not
well thought out. This serves to illustrate that not all affine transform
combinations yield interesting results.
|
|
Consider next a pair of transforms we will call the pinwheel
pair.
1. xsize=1, ysize=1, xspin=PI/4, yspin=PI/4,
xdisp=5, ydisp=0
2. xsize=.5, ysize=.5, xspin=-PI/4, yspin=0, xdisp=0,
ydisp=0
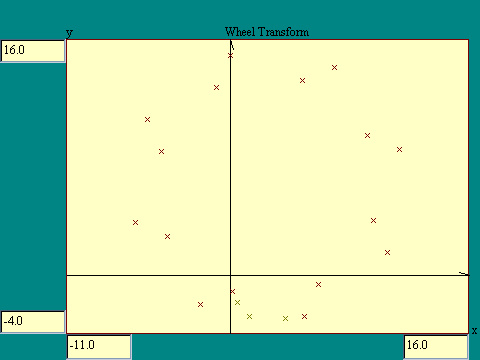
Notice that transform 1 spins the point 45 degrees counterclockwise and shifts
it 5 units in the +x direction. The number 2 transform shrinks the point toward
the origin and spins the x component of the point 45 degrees clockwise. Run the
pinwheel pair transform
display to see these transforms in action.
|
|
|
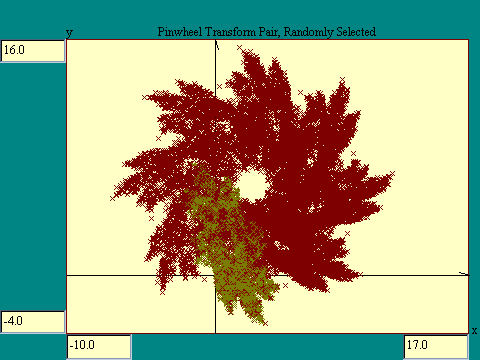
Now to see the sort of image which may be generated by random
application of this transform pair, run the
random pinwheel pair transform
display.
There is nothing necessary about the randomizing process. You
could have achieved the same results by systematically exploring
all the possibilities with manual transform selection. The total
picture is defined by the two transforms as they operate on one
another. Each one provides a source of starting points for itself
and the other. The randomizing process just makes it easier to
cover the many possibilities than does the manual process. Also
the transform selection process is not strictly random. Random
selection would mean that each transform would have an equal
opportunity at being selected. Some transforms however cover more
area than others. So as to optimize the process, "big"
transforms are favored in the selection algorithm.
|
|
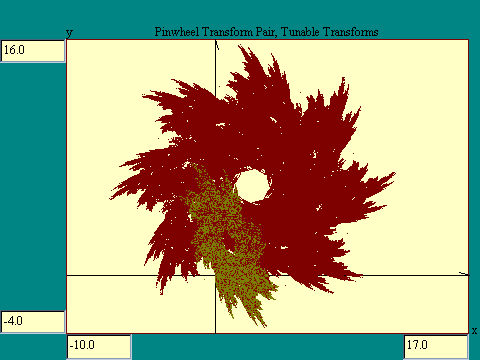
There is an alternative way to display the effect of the
transforms as they are randomly iterated. That is to show the
transformed point as a vector. In the next display we do that,
Color-coding the vectors red for transform 1 and yellow for
transform 2. This is intended to help you visualize how each
transform takes its starting point to a new location. In order
for a point to be lit, it must satisfy the condition that it may
be reached by one of the two transforms from a point that has
already been lit under the same restriction. Run the
transform vector
display.
|

|
|
The iterative process by which points are lit on the screen leads
to the development of a complex picture as the two transforms
exchange information. In the next display we do away with some of
the artifacts that we attached to our points previously like
x'es and vectors, and just light the corresponding pixel.
Notice that we start the process with x=-4 and
y=-2 and that a few of the initial points are not connected.
These two transforms define a figure that does not extend that
far out, farther illustrating the point that only a limited set
of points is accessible to this pair of transforms. Also pay
attention to the boundary of the figure. It looks like a fractal
boundary and so it is. Run the
Tunable Transform
display.
In the image at the right I let the display run for a long time. Notice that
there are holes on the left half of the image that are larger than those
symmetrically placed on the left. Think back to the lesson on
extending graphing concepts
where we used random chance to fill in a graph. This is an extreme example of
the same idea. In sufficient time perhaps most of the interior holes would get
filled in. I suspect that the central hole though is permanent.
|
|
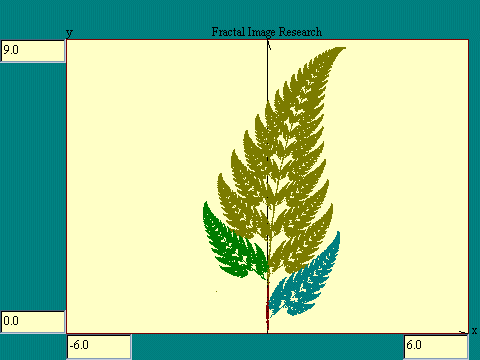
In the
Fractal Generation Research
display we start you out
with a four transform example. You may modify the transforms and
add up to two more. You may select any number of up to six
transforms to be active. The zoom feature, introduced in earlier
lessons, is enabled in this display. The limitations of the Java
language and web security prevent us from offering you the
opportunity to save your work and reload it at a later time. The
Windows version of "Order - A closer look at chaos" has
that capability and more that we cannot duplicate on the web.
You will find with a little practice you can create some striking
images by experimenting with the Transform Control Panel. This
program is intended only to provide a rudimentary capability in
this area as an aid to understanding the mathematics behind the
process. Serious image production requires the use of a dedicated
fractal graphics program.

Are there any questions?
|
|

 Next
Next
 Previous
 Other
Other
|


